
Allow me to start off by saying that I really love pancakes. By no means am I a carb monger, but pancakes are wonderful. Personally, I like to add butter, chopped walnuts, sliced bananas, and then drizzle it all with an excellent honey. For me, this is the ultimate start to the day and I’m ready to tackle anything with kind of breakfast in my belly.
Pancakes are a very versatile food. You can mix a large volume of batter, cook extra and then freeze them. I usually eat mine within a few days’ time, but I’ve never had one go bad on me. Once frozen, they’re easy to pop in the toaster for a great quick snack in the morning, or for in between meals. In fact, when traveling abroad, you’ll notices that many countries have pancakes in the display of their cafes – a healthy and popular option to have with a coffee or tea in the morning, or to tame your temperamental tummy when hungry.
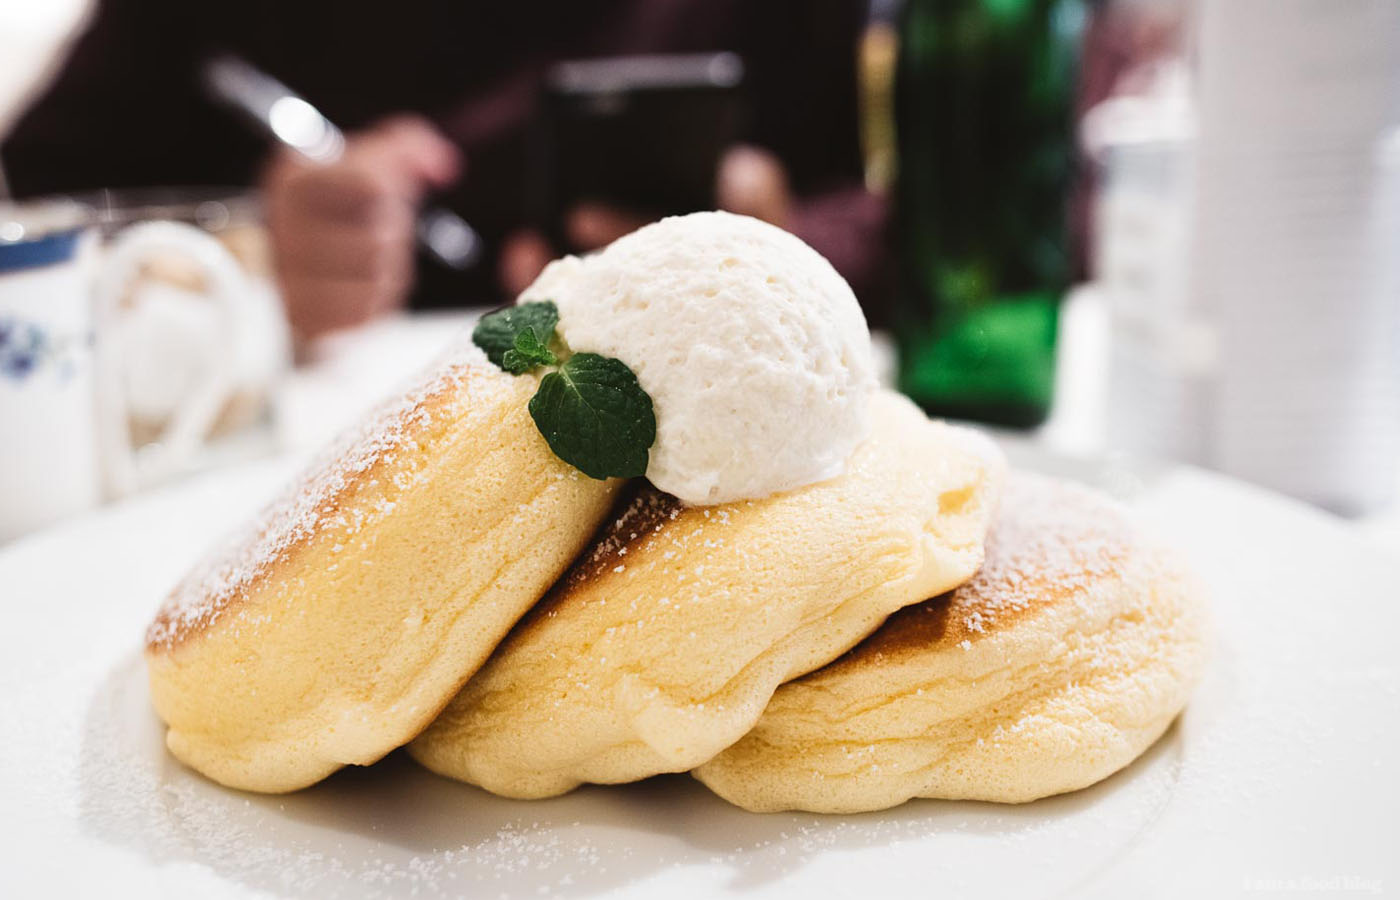
Lately, images of these looking Japanese souffle pancakes have been popping up all over the internet and in my feeds. By the third time it happened, I realized that I was staring at the image. The Japanese souffle pancakes looked tantalizingly light and fluffy – like a mythical pancake if I have ever seen such a thing. Stacks of these beautiful pancake puppies just kept calling to me. And, I am not alone – apparently, they’ve attracted a cult following all over the world.
So, if you’re like me and you love pancakes, yet are open to trying a variation on a classic American breakfast dish, then this Japanese recipe might be for you. Come on, how can you pass up the chance to try delightful pancakes so light, fluffy, pretty, and packed with healthy egg white protein.
These pancakes use the same basic ingredients as the American short stack species: flour, milk, and eggs. The difference being that the eggs are separated, and the whites whipped which creates a meringue texture for airy volume – it contains air bubbles and acid that hold a structure inside the batter. Usually, the trick to whipping up a descent bowl of meringue is with a reliable stand mixer. A stand mixer is a seriou tool to have that will uncomplicate your life when serious about baking
If by chance you fail on the first few times around, remember not to give up. Continue to experiment a little more with rations and timing to achieve the pancake equivalent to a cloud. Just remember to whip the egg whites until stiff peaks form.
On another note, it is important to prepare all of your ingredients prior to whipping up your cakes. For example, be sure to let the eggs sit at room temperature for at least a half an hour before cracking them open and into the mixing bowl. The reason for this is that you won’t get as much volume out of a cold egg white as opposed to one that’s come to room temperature. Fresh eggs will also be more stable than using older ones.
Last but not least, do not forget to add the cream of tartar, which acts as an acid stabilizer and ensures that the meringue will keep its structure and shape throughout the cooking process on a hot griddle.
Recipe: serves two people, 45 minutes to make, medium difficulty
- A stand mixer (like the KitchenAid Artisan)
- A whisk
- Two large mixing bowls
- Measuring spoons
- A baking spatula, for mixing
- A cooking spatula, for flipping
- A griddle or flat pan
- A pastry bag
- 4 eggs, separated
- 1 tbsp cream of tartar (substitution: lemon juice or white vinegar)
- ½ cup confectioner’s sugar
- ¼ cup whole milk
- 6 tbsp flour
- 2 tbsp vegetable oil
- 1 tsp vanilla extract
- 1 tbsp butter, for greasing
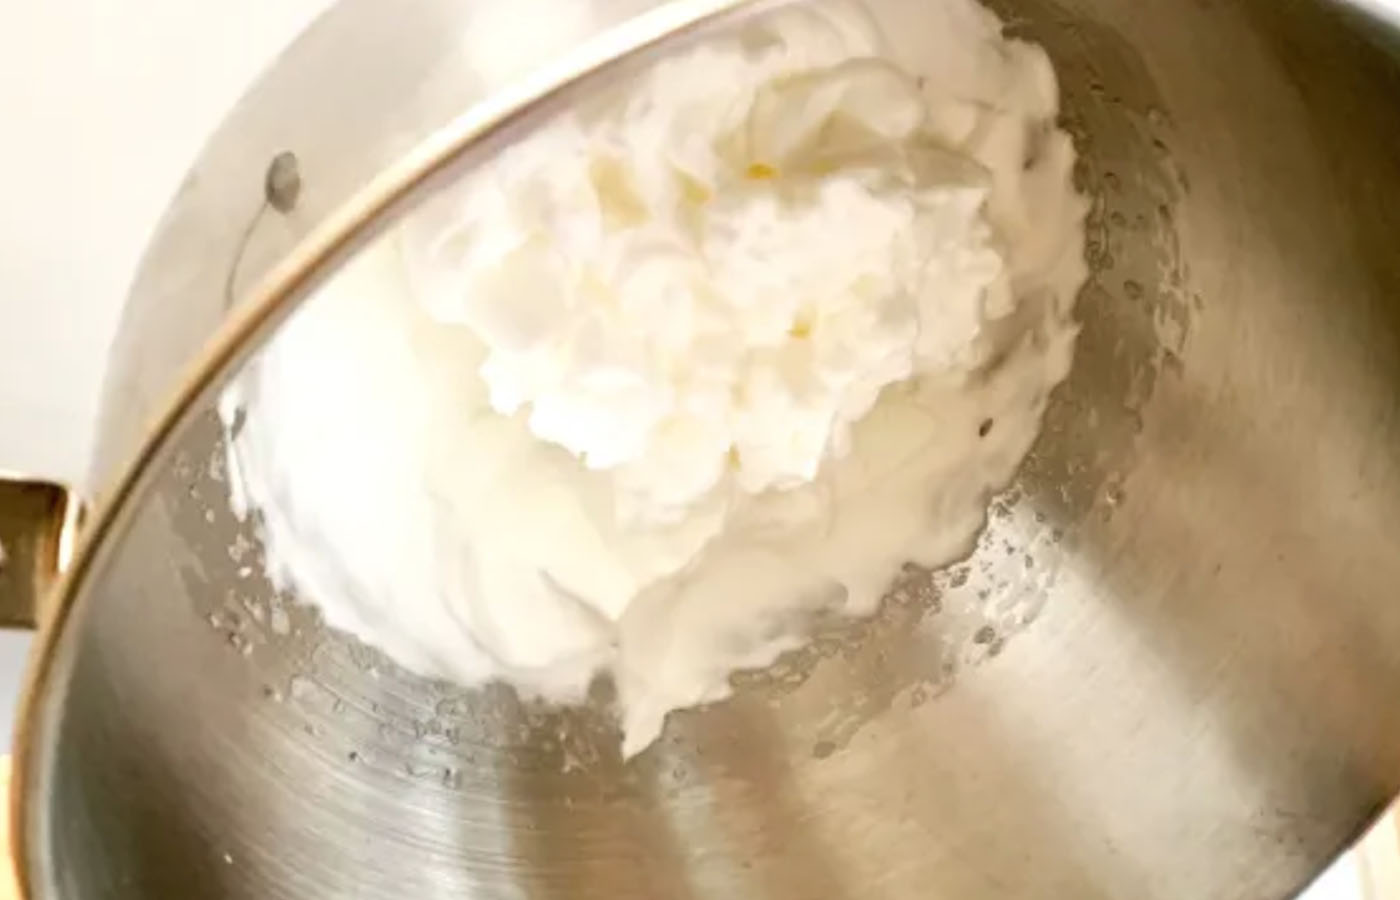
Step 1: Make the meringue
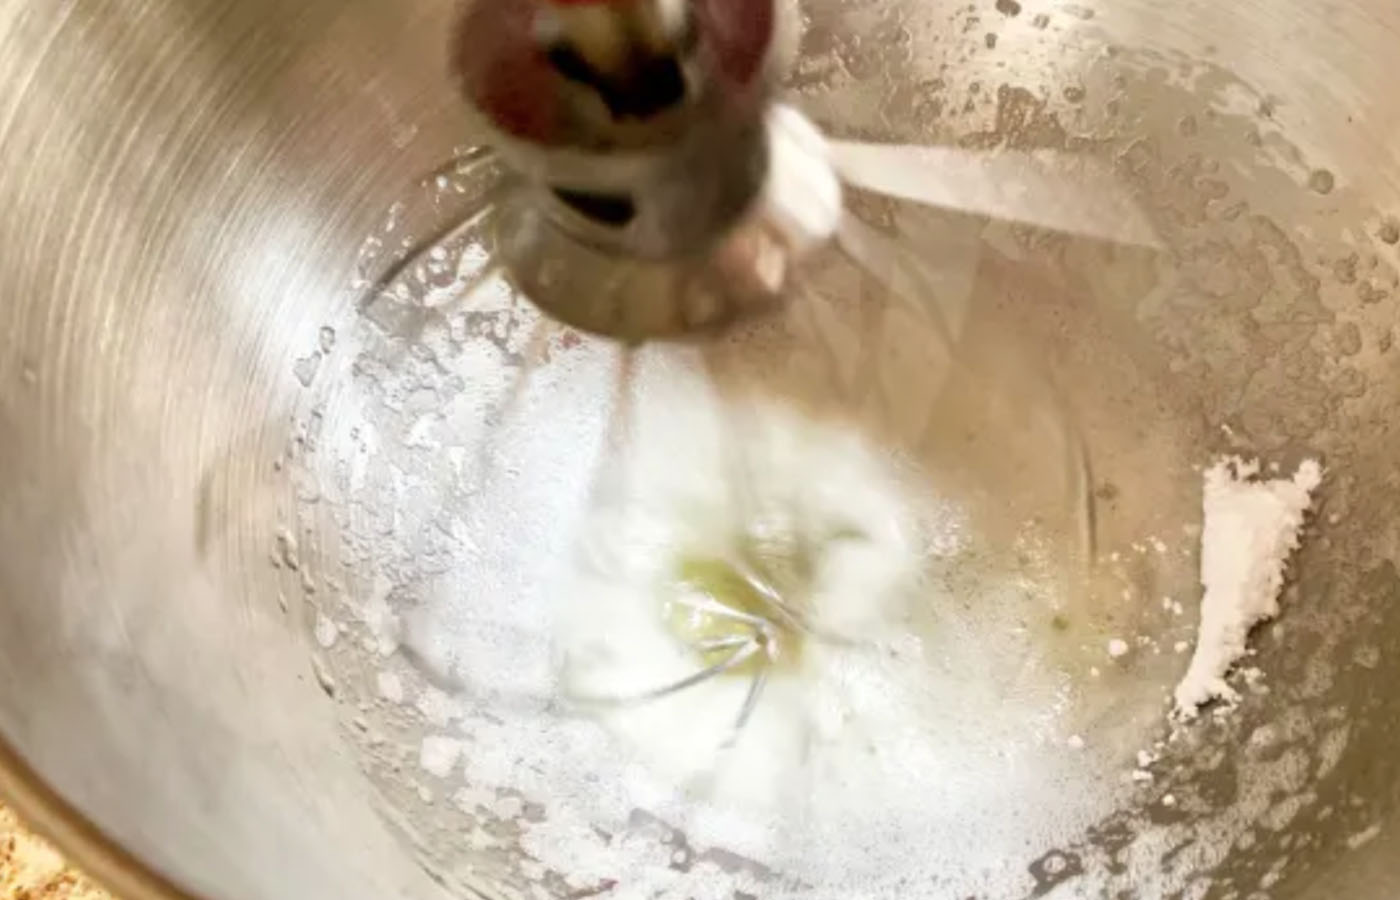
In a large bowl, separate the egg yolks from the egg whites. Put the egg whites in the stand mixer bowl, and then add cream of tartar. Start the stand mixer at low speed. Stop the machine when the egg white mix turns frothy, then add the confectioner’s sugar. Turn it back on at its highest speed until the egg whites form stiff peaks. Stop the machine, take out the bowl and flip it upside down to check if the meringue is stiff enough.
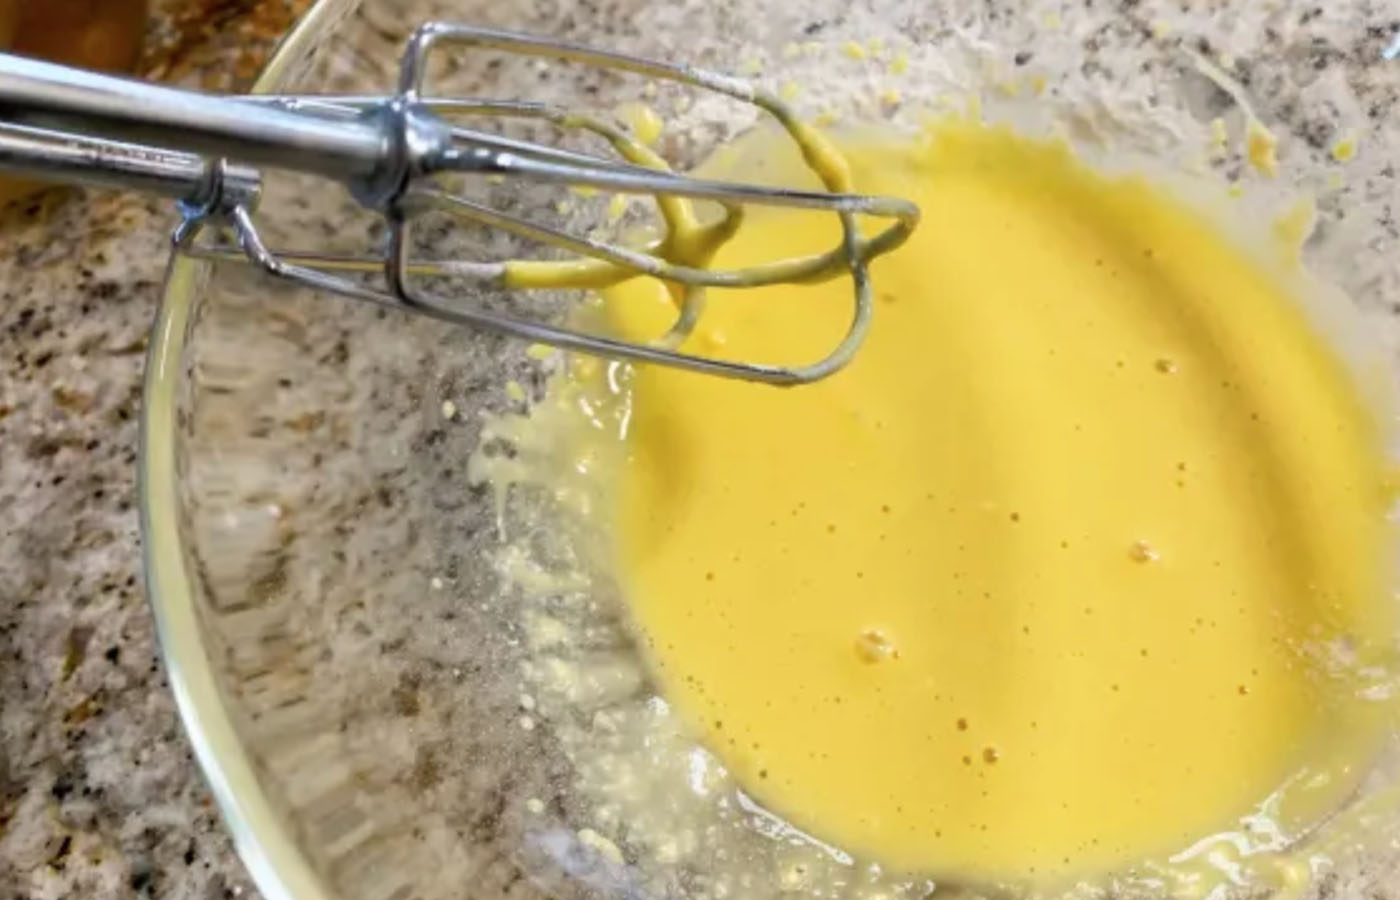
Step 2: Mix the pancake batter
In a different bowl, add the egg yolk, vanilla extract, milk, and vegetable oil. Whisk until well-incorporated—you can also use a hand mixer if necessary. When everything is mixed, add the flour and keep whisking until the batter achieves a syrup-like consistency.
Step 3: Fold the meringue into your pancake batter
This is the most important step in order to make your pancakes jiggly. Use a baking spatula to take out one scoop of the meringue and dump it in the batter. Gently fold together until you don’t see any white bits in the batter. Then, fold the remaining meringue, one heaping spoonful at a time, into the batter mix. Repeat the motion until the egg whites and the batter have been well-incorporated but not overly mixed.
Step 4: Cook your pancakes over low heat
Let the griddle sit on the lowest heat possible and grease the surface with butter. Using the baking spatula, scoop out the batter and place it in a pastry bag. Cut a half inch hole on the bottom of the pastry bag and carefully squeeze out the amount of batter required in a spiral motion to make your desired size of pancakes onto the griddle.
Wait a minute to let them stabilize, then top off the existing pancakes with another round of squeezing until you reach your desired pancake height. Make a dome-shape tinfoil cover and place over the griddle or pan—this will help your pancakes rise. Let them cook over low heat for 10 minutes.
Step 5: Flip the pancakes
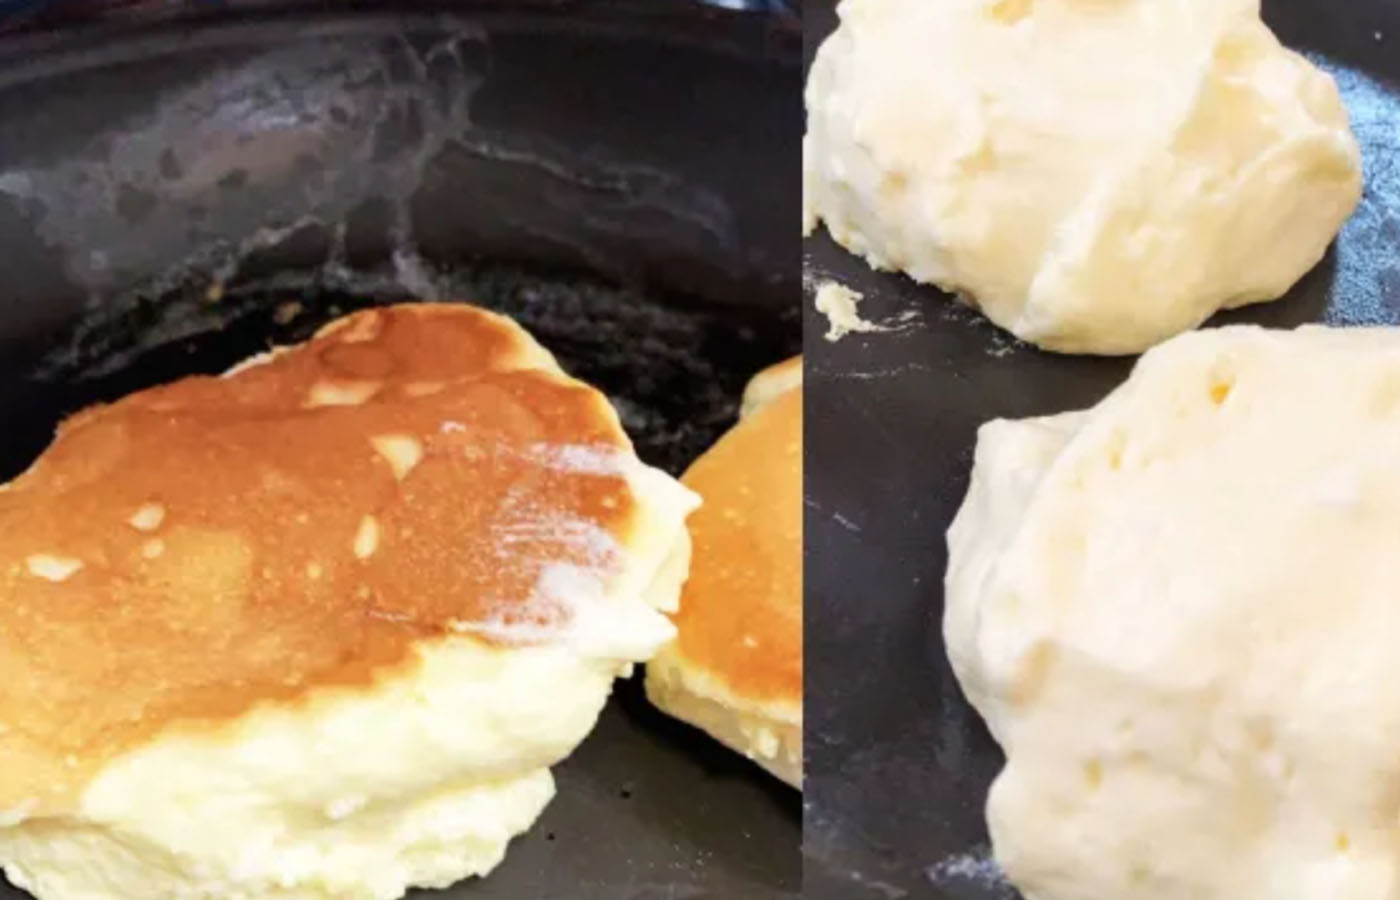
After 10 minutes, remove the tinfoil and check the doneness of the pancakes. Use a cooking spatula to gently lift up the bottom of one—if the bottom is golden-brown and you can lift it off the griddle smoothly, that means your pancakes are half-way there. Then, just as you would with regular pancakes, flip them and let the other side cook for about seven minutes.
Step 6: Prepare and serve
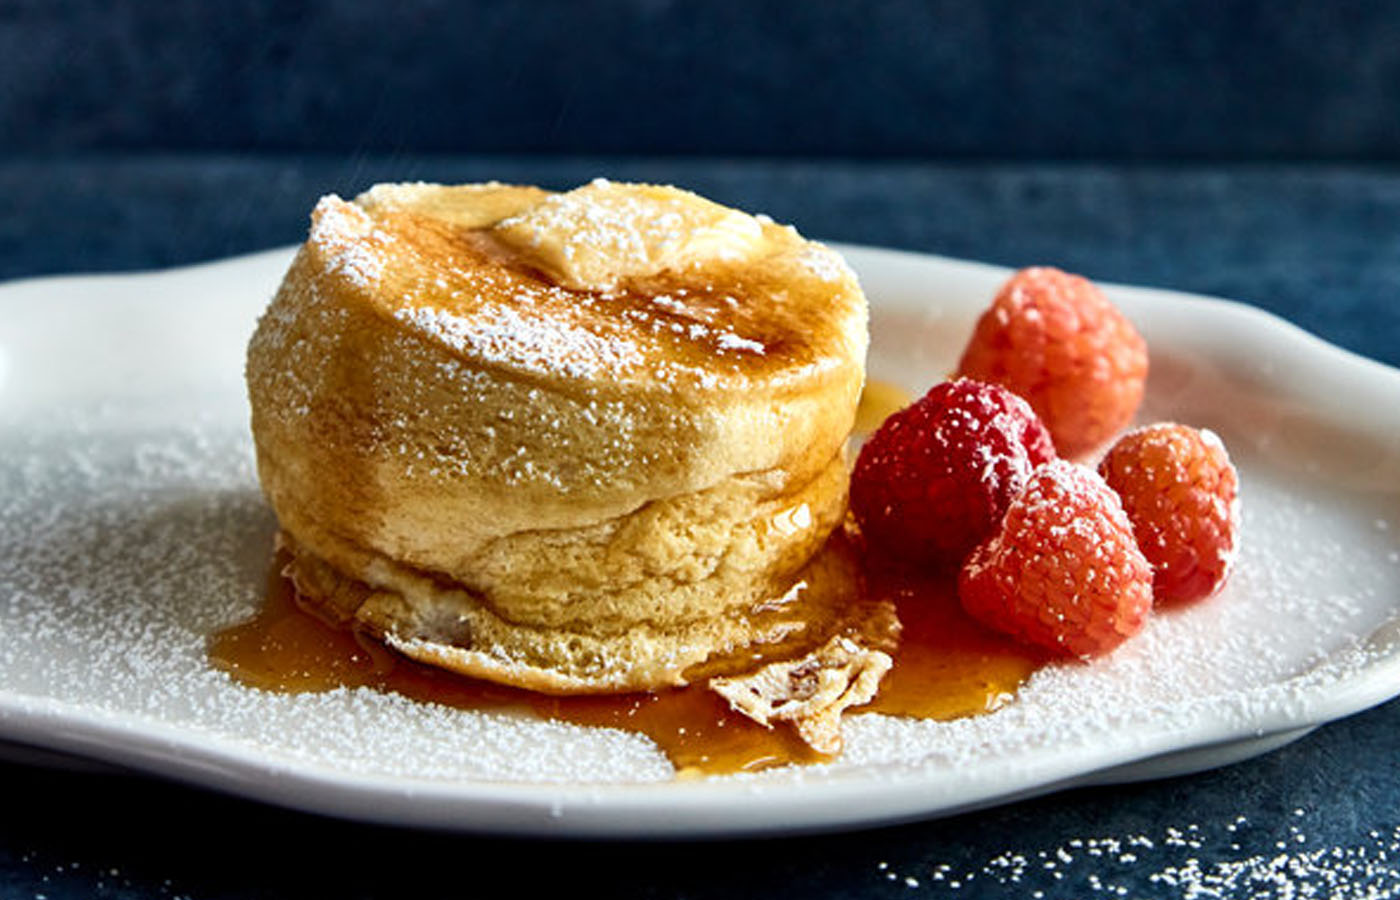
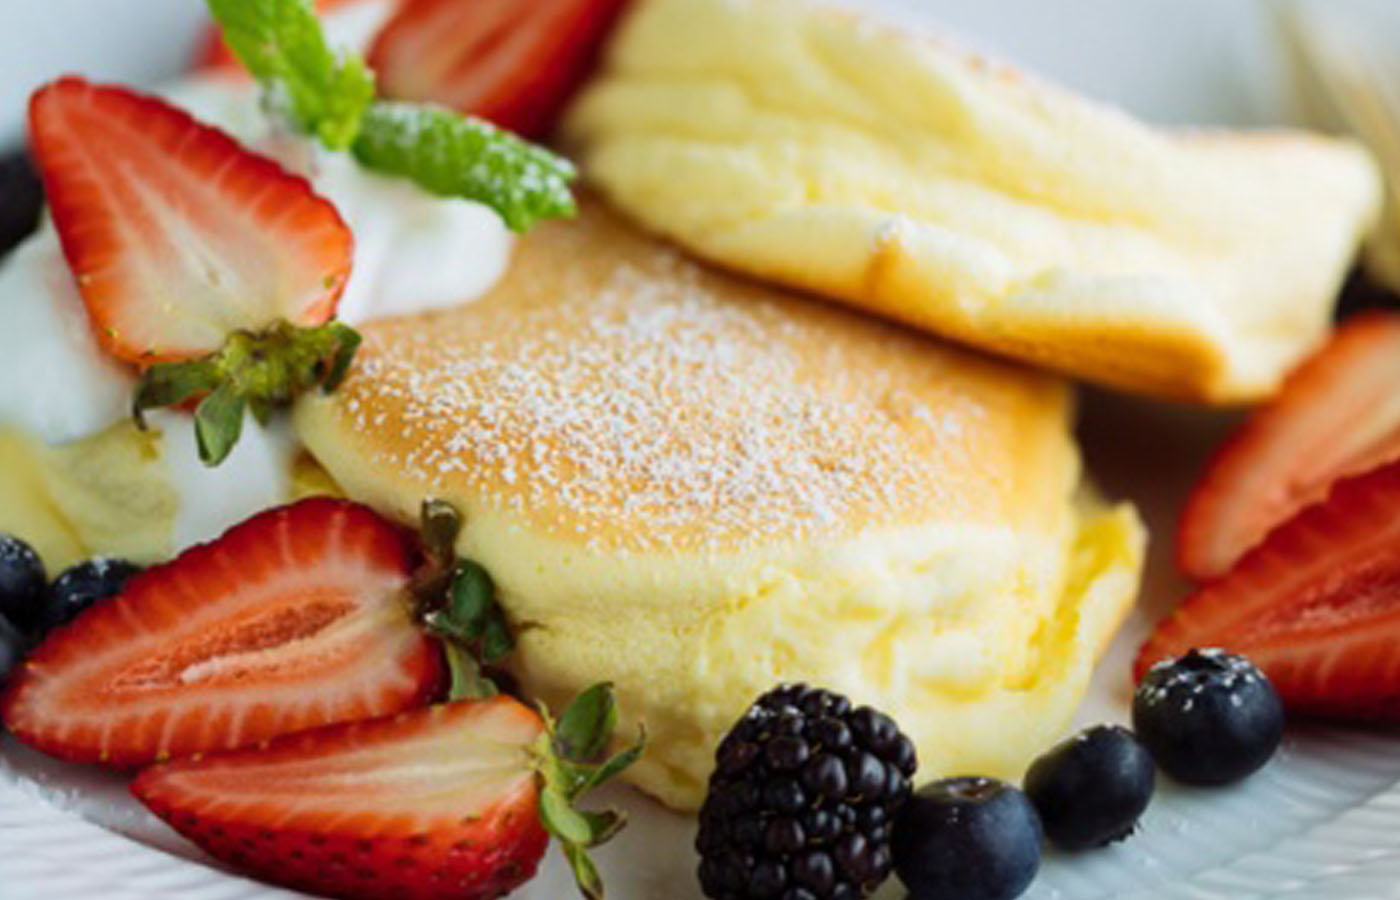
The perfect soufflé pancakes should be golden-brown on both sides and airy and fluffy in the middle. Serve with maple syrup, honey and fresh fruit—and serve them while they’re hot.
Please give us feedback on the recipe!

1 Comment
Janet Rodda
Is it possible to freeze these fluffy pancakes? If so, what would be the best way to reheat them? Thank you
Comments are closed.